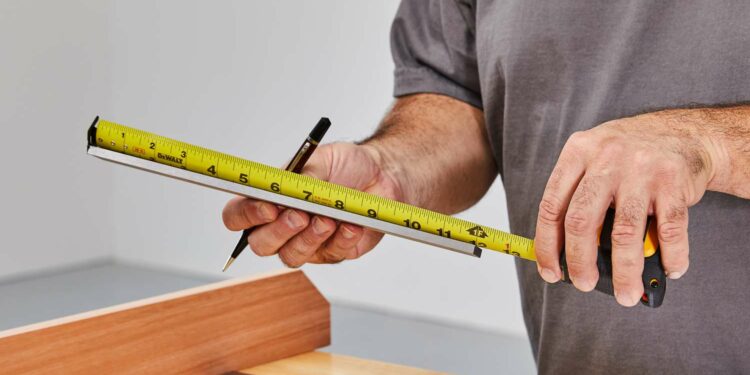
Have you ever found yourself struggling to measure an object or space accurately?Learning how to read a tape measure is important if you are a DIY enthusiast, a car painter, a tailor, or just someone who likes to take on projects around the house.
A tape measure is a versatile and indispensable tool that can help you achieve precision in your measurements, leading to better results in your projects.
Understanding how to use a tape measure effectively goes beyond simply knowing how to read the numbers and lines. It involves comprehending the different components of the tape measure, such as the blade, hook, and various markings.
In this comprehensive guide, we will teach you tape measure reading techniques and equip you with the knowledge and skills needed to interpret those seemingly cryptic markings on the tape confidently.
Understanding Tape Measures Parts
You must become familiar with the tape measure’s main parts in order to use it correctly. You can take precise measurements if you know how each component works. The principal parts of a tape measure are as follows:
1. Blade
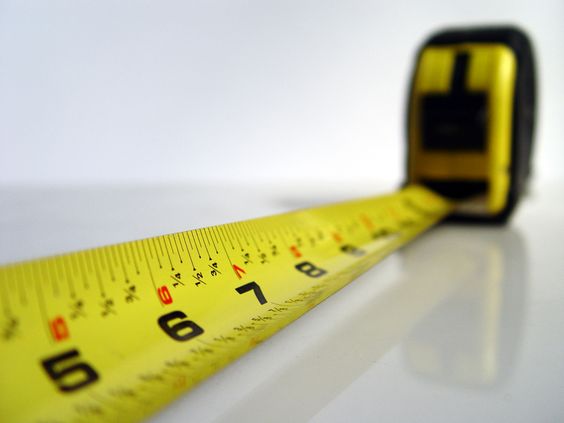
The blade is the long, flexible strip that extends from the tape measure’s housing. It is usually made of steel for durability and is marked with measurements along its length.
2. Hook
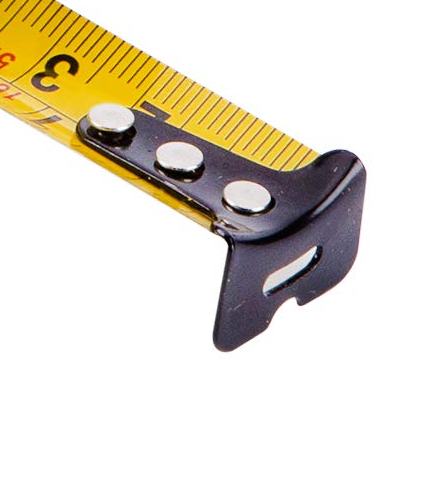
The hook is located at the end of the blade and is designed to latch onto an object securely. It ensures the tape measure stays in place while you take measurements. The hook typically has a small slot or hole to allow for precise measurements when measuring from an edge or corner.
3. Housing
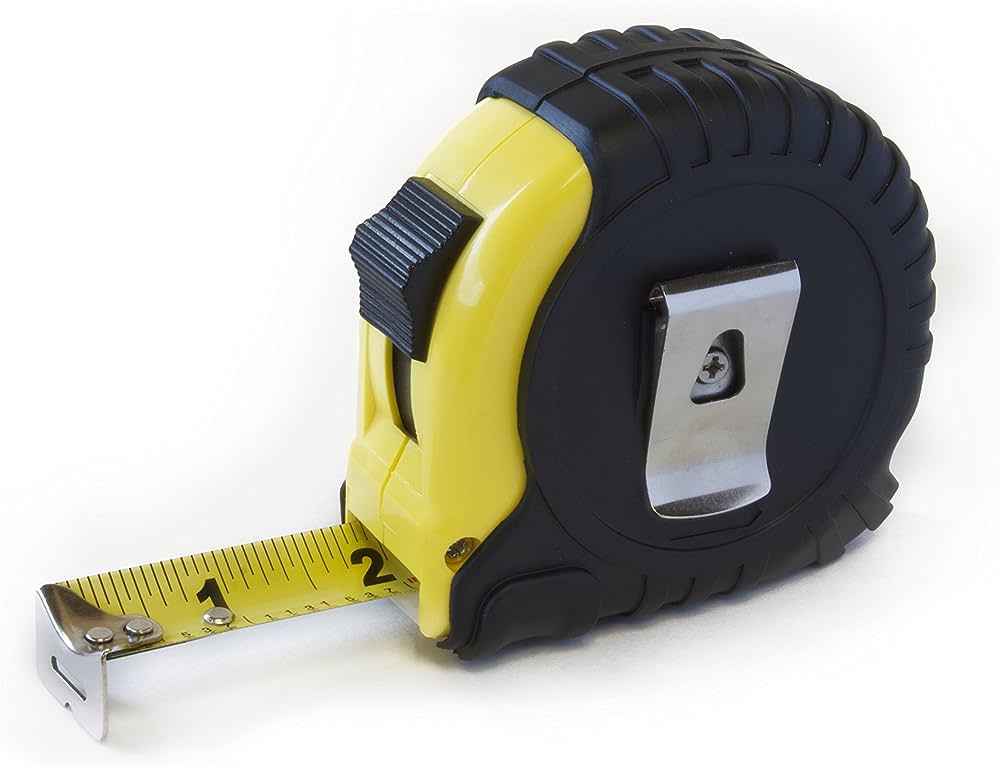
The housing holds the blade and provides protection when the tape measure is not in use. It often features and locking mechanism to keep the edge from retracting unintentionally.
Different Types of Tape Measures
Tape measures come in various types, and it suited for different purposes. Here are the most common types of tape measures:
1. Self-Locking or Retractable Tape Measures
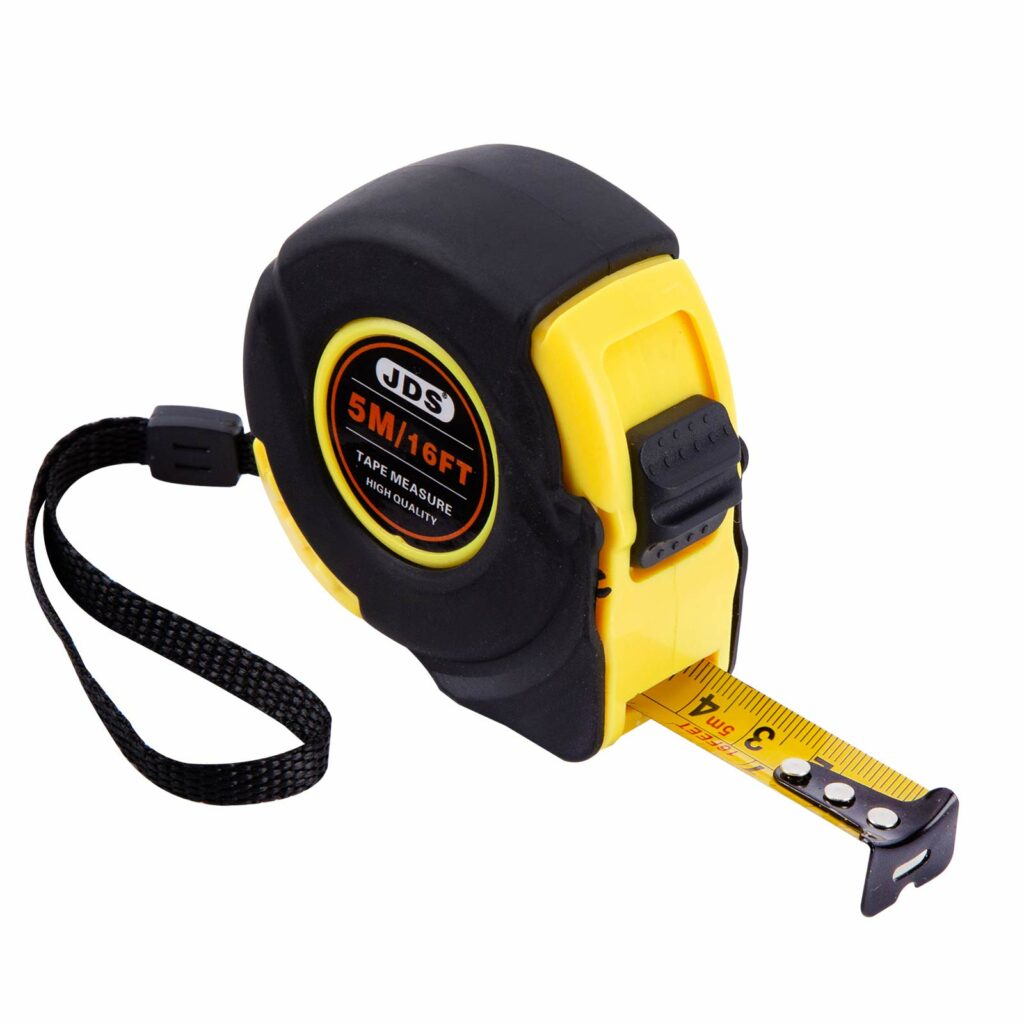
The step measures feature a mechanism that automatically logs the blade in place when extended. This allows for easy, hands-free measurements without worrying about the tape retracting. To retract the blade, you typically need to press a release button or lever.
2. Long Tapes
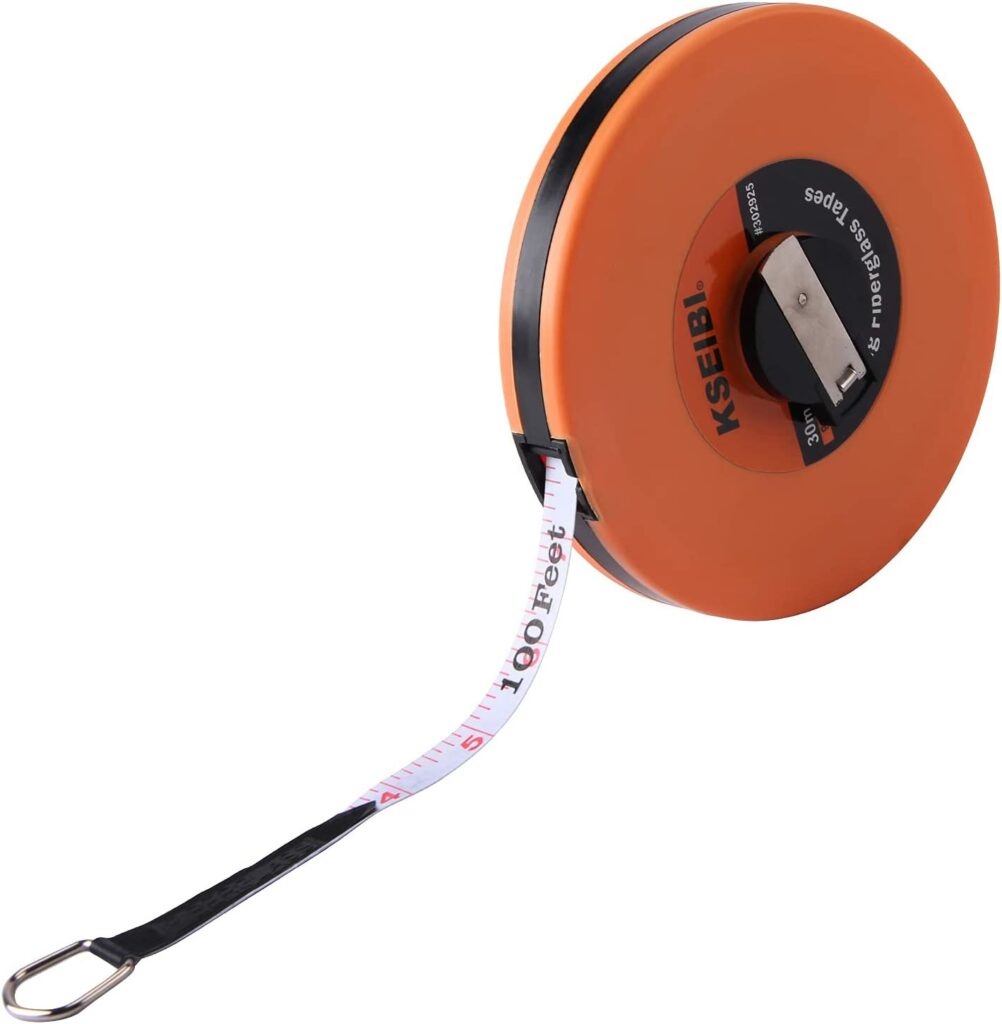
Long tapes are designed for measuring large distances. They have a wide blade that can extend up to several meters or feet. Long tapes often come with a crank handle to retract the blade manually.
3. Pocket-Sized Tape Measures
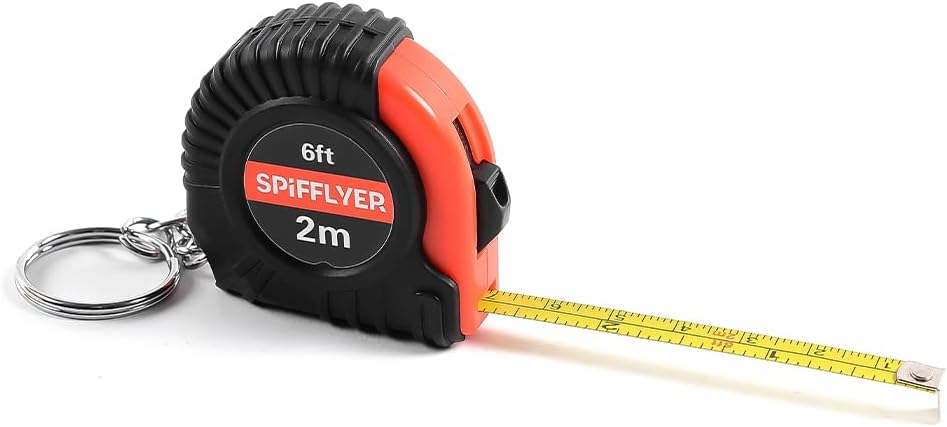
These compact tape measures are small enough to fit in your pocket or tool belt. They are convenient for quick, on-the-go measurements and are ideal for tasks that require portability.
When selecting a tape measure, take into account the precise specifications of your work. You should evaluate the length of the measurements you will be taking, the degree of accuracy required, and the level of portability that best meets your requirements.
Tips for Selecting the Right Tape Measure
The accuracy and effectiveness of your measurements can be significantly impacted by the tape measure you choose. Here are some suggestions to assist you in choosing the best tape measure for your requirements:
- Determine the typical length of measurements you will be taking. For general household projects, a tape measure between 25 and 30 (7.5 to 9 meters) should suffice. If you frequently work on larger projects or construction sites, consider a longer tape measure.
- The width of the tape measure’s blade affects its readability. A wider plate, typically 1 inch (25mm), provides better visibility of the markings, especially for those with visual impairments. However, keep in mind that wider blades can be less flexible.
- You must consider the durability of the tape measure’s blade. Look for a blade made of study materials such as steel or fiberglass, which can withstand wear and tear over time.
- Ensure that the tape measure has clear, easy-to-read markings. Look for crisp and well-defined numbers, lines, and fractions to facilitate accurate measurements.
Tape Measure Markings and Measurements
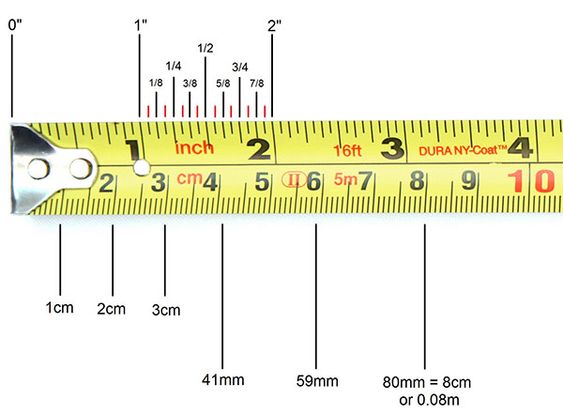
Tape measures utilize different units of measurement depending on the region or application. You should understand these units as it is essential for accurate tape measure reading. The most common units used are inches, feet, and centimeters.
Inches are the main unit of measurement used in everyday situations. They can be divided into smaller fractions like ½, ¼, and ⅛. These fractions help us make more precise measurements, especially when working with smaller objects or spaces.
Feet or another commonly used unit on tape measures. One foot is equal to 12 inches. When measuring longer distances, it is more convenient to use feet instead of inches. For example, a measurement of 6 feet and 3 inches would be expressed as 6 ‘3″. Centimeters are the metric unit for measurement and are found on tape measures.
Additional Markings and Features of a Tape
In addition to basic measurements, tape measures may include additional markings and features to assist with specific applications. Here all of you:
1. Stud Marking
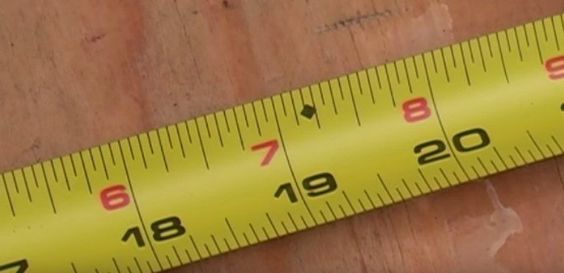
Some tape measures have additional markings at regular intervals, typically 16 inches or 19.2 inches apart. These markings are designed to help locate the standard spacing between wall studs. They were particularly useful in construction and framing projects.
2. Centerline Indicators
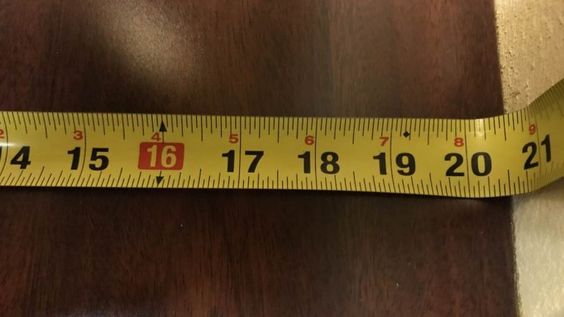
Certain tape measures include centreline indicators, which help you locate the exact midpoint of a measurement. These indicators can be useful when marking a Centre point or dividing a measurement equally.
3. Decimal Conversations
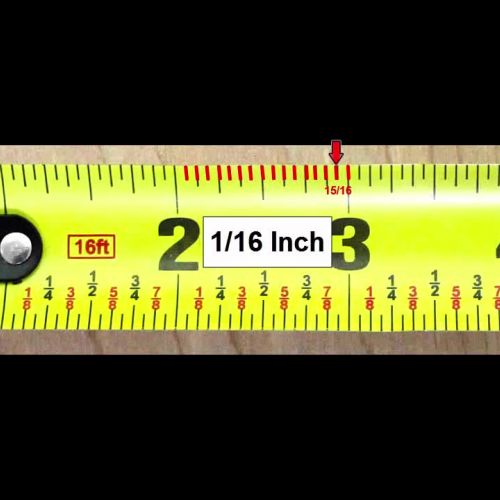
Some tape measures provide a decimal equivalent for common fractions. These conversions were usually found on the opposite side of the fraction markings. They allow you to quickly reference the decimal value of a particular fraction, simplifying calculations and conversions.
4. Red Highlighting
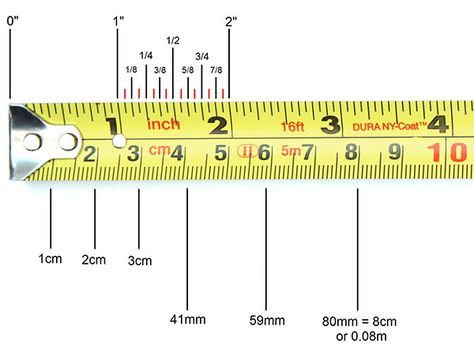
On certain tape measures, you may notice certain markings or numbers highlighted in red. These highlights indicate common measurements or reference points that are frequently used in specific industries or applications. Paying attention to these highlights can save time and improve efficiency in your measurements.
Mastering Tape Measure Reading Techniques
Depending upon the type of object you are measuring and if you want to measure length, angle, or circumference, different techniques are used.
Let’s delve into each.
1. Straight Line Measurements
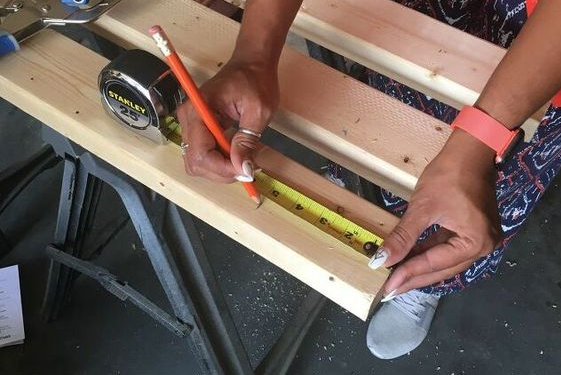
- Step 1: Align the hook of the tape measure at one end of the object or space you wish to measure.
- Step 2: Extend the tip along the length, ensuring it remains taut and straight.
- Step 3: Read the measurement at the point where the tape intersects the other end of the object or space.
- Step 4: Take note of any fractional or decimal measurements, depending on the markings of your tape measure.
Avoiding Common Errors:
- You must ensure that the tape measure is parallel to the object being measured to award accurate tape measure readings.
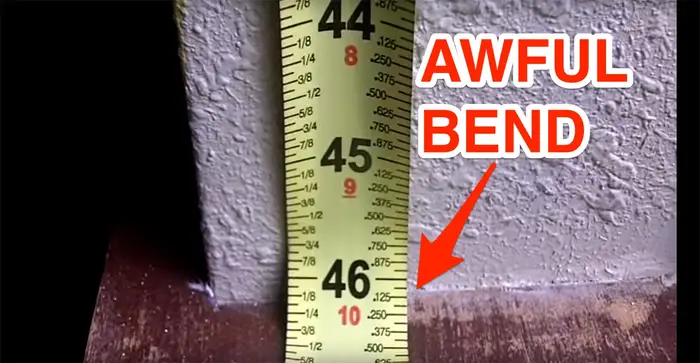
- Double-check that the tape is not twisted or bent during measurement, as this can lead to incorrect results.
- When measuring large distances, consider using a helper to keep the tip straight and prevent it from shaking.
2. Measuring Angles
- Step 1: Angle measurements can frequently be made using the marks on the tape measures. On the tape measure, look for the degree indication.
- Step 2: Align the tape measure accurately and place it along the angle’s one side.
- Step 3: Check the degree reading at the point on the day where the opposing side of the angle intersects.
3. Measuring Inside and Outside Corners
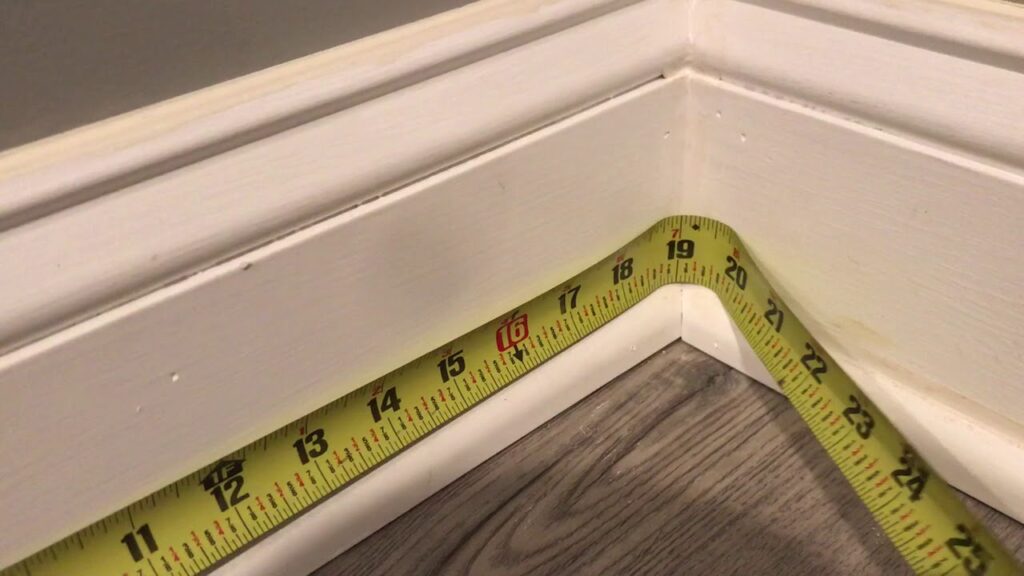
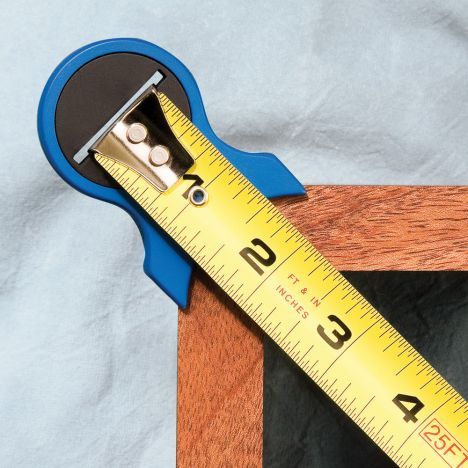
If you want to measure inside corners, hang the tape measure from the hook at the point where the two walls meet. You have to read the measurement where the tape crosses the other wall. In the case of the outside corners, you should hang the tape measure from the hook on the edge of one wall. You can measure at the point where, if extended, the other wall would cross the tape.
4. Measuring Curves and Circles
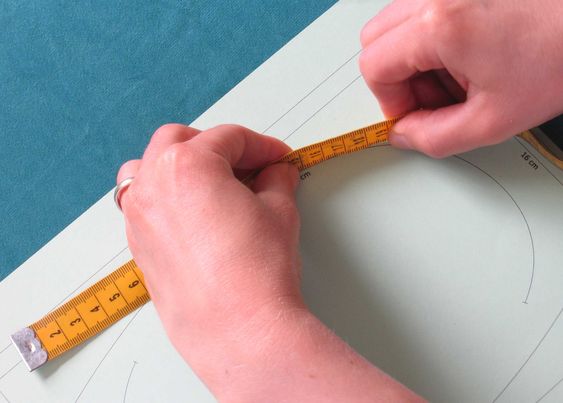
For measuring cord or circular objects, you can use a flexible tape measure.
- Step 1: Gently bend the tape to confirm the shape of the object.
- Step 2: You must ensure that it follows the curve accurately.
- Step 3: Now, take the measurements along the curve and record the tape measure readings.
Alternatively, you can use a string or flexible material to measure a curve or circle. Wrap the string around the object and mark where it completes one full revolution. Now, measure the length of the marked string with a tape measure or ruler to determine the circumference or diameter.
5. Adding and Subtracting Measurements
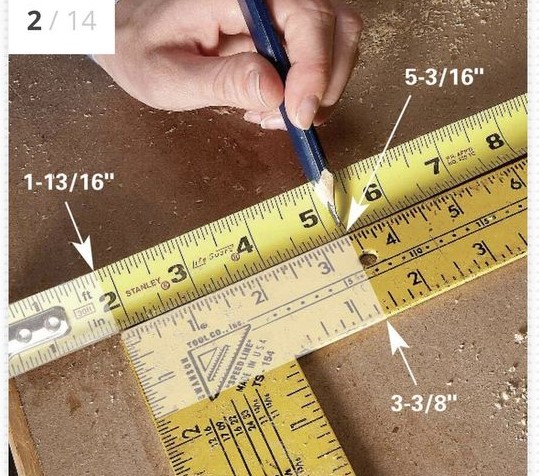
To add more measures together, just add the number and fractions. Remember to use the same units for all the measurements you are working with. If the units are different, convert them so they match before adding them up. For example, if you are adding inches and feet, make sure to convert inches to feet or feet to inches before adding them up together.
However, if you want to subtract one measurement from another, similarly subtract the numbers and fractions. Also, pay attention to the units and ensure consistency for accurate results.
You must remember to practice these tape measure reading techniques regularly to improve your proficiency and to ensure precise measurements in various scenarios.
Common Tape Measure Mistakes to Avoid
You would get an incorrect reading if you made a mistake. Here are a few common mistakes that might affect the accuracy of your tape measure reading:
1. Hook Placement
Incorrectly positioning the tape measure’s hook can result in measurements that are significantly off. If you wish to get accurate measurements, make sure the hook is firmly on the edge or other reference point
2. Misreading Measurements
If you misinterpret tape measure markings of fractions, it can result in measurement errors. Take your time to read the markings carefully, especially when you are dealing with similar increments or fractions.
3. Not Accounting for the Tape Measure’s Width
The width of the tape measure’s blade can affect measurements, particularly when you are measuring inside or outside dimensions. You should take into account the width of the tape measure and line it accordingly to obtain accurate results.
4. Using Damaged or Worn Tape Measure
Over time, tape measures can become worn or damaged, affecting their accuracy. You should regularly inspect your tape measure for any signs of damage or wear, such as bent blades or faded markings. You must replace worn-out tape measures to ensure reliable measurement.
Tips for Maintaining Tape Measures
You must keep your tape measure in good condition to ensure that its longevity improves. Following basic maintenance tips would bring a great difference.
- Keep the Blade Clean: You must regularly wipe the blade with a clean cloth to remove dirt, debris, and moisture. This helps maintain the readability of the markings and prevents corrosion.
- Store Properly: You should store your tape measure in a dry and clean location to prevent damage when you are not using it. Also, you should avoid exposing it to extreme temperatures or humidity, as these can affect its accuracy and longevity.
- Avoid Dropping or Impact: Accidental drops or impact can damage the tape measure’s internal components and affect its measurements. You should handle your tape measure with Care to prevent unnecessary damage.
- Periodic Calibration: If you frequently rely on precise measurements, you should consider having your tape measure calibrated periodically by a professional. Calibration ensures its accuracy and reliability.
Improving Tape Measure Reading Skills
The more you use a tape measure, the more familiar you will become with its marking and increments. Always practice measuring various objects and spaces to enhance your tape measure reading skills.
In some cases, using additional tools can assist in accurate measurements. You should consider using a level or square to ensure the tape measure is aligned properly, especially when you are measuring angles or corners.
Conclusion
Mastering tape measure reading is a tricky yet incredible skill for everyone willing to get accurate measurements. You can confidently master the application of tape measure in a variety of situations by learning and comprehending the various tape strategies.
It is important to select the right measuring tape based on your particular usage and requirements.
If you are uncertain about a specific tape measure reading, marking, or feature, consult the user manual or reach out to the manufacturer for clarification. Understanding the specifics of your tape measure can help you make accurate measurements.
By equipping yourself with the right knowledge and tools, you’ll be able to conquer any measuring challenge that comes your way.


